Making a DIY Trasharoo can save you a lot of money, most people find they have most of the materials already! It also allows you to customize the trash bag to your unique needs, you can add as many pockets and features you like without breaking the bank.
DIY options can also double as a bag pack when removed from where it’s hung. This is because they are generally made from recycled bag-packs with extra straps added to attach them to your spare wheel or another suitable area.
Making your Trasharoo is also more environmentally conscious. Most materials you will need should be easily found around your house or second-hand from thrift stores or similar. This means you can decrease your carbon footprint and avoid products that overuse plastic products like PVC.
Things to Consider Before You Begin
It can help to have a concrete understanding of the purpose, nature, and necessary equipment you will need to bring your DIY vision to life. Below are some key points for you to consider before you begin making your own Trasharoo.
Choosing a great bag to start your project
Use a bag that reflects the size and capacity you will need for what you want. The larger the bag the more space you will have for your rubbish. However, do not overdo it, you will still want it to be approximately the size of your spare wheel for convenience’s sake.
This bag should also be made out of highly durable and water-resistant fabric like a heavy canvas to ensure you are not making a replacement every few months. Army rucksacks and other large bags are perfect to start your project with. If you do not have a suitable bag laying around the house consider hitting up some thrift stores to save money instead of purchasing a brand-new bag.
Water (and other elements) proofing
[azonpress template=”widget” asin=”B01N4V2DG9″]You will want to have a good idea of what weather protection you will be adding to the bag before you begin constructing the bag. Heavy fabric will be water-resistant to light rain, however many people prefer their Trasharoo’s to be fully waterproof.
You can waterproof your bag in many ways. The easiest way is to purchase waterproofing sprays and seam sealers. These are reasonably cost-effective and should be easily sourced either online or in your local hardware and camping stores.
Combining waterproof sprays and seam sealers will ensure that your gear is completely protected from rain and water damage. Alternatively, you can sew water-resistant fabrics including recycled raincoats to the outside of the bag to ensure your bag is waterproof.
You may also want to protect your bag from UV damage. UV can cause your bag to fade and weather much more quickly.
Purchasing straps and buckles
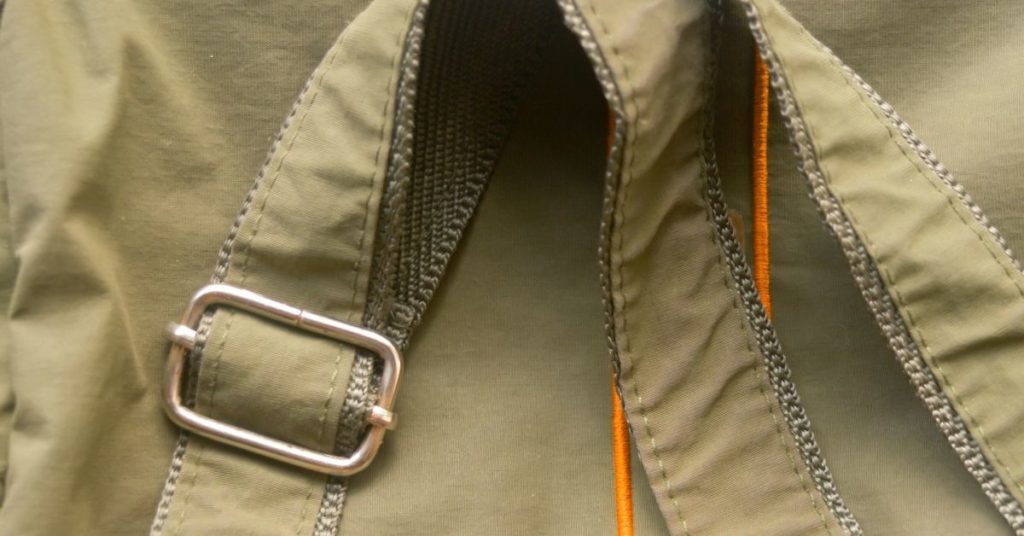
Straps are a key part of your modifications; without them, you have no way to fit the bag into your camping setup/ spare tire. Especially if you are using the bag to store heavier gear or firewood you will want to splurge and buy heavy-duty straps. For maximum security for your bag, you will want to buy straps made from quality materials like canvas or nylon which are at least 1 inch thick.
You can buy straps with buckles attached both individually or in packs. Choosing straps with buckles attached will make the modifications to the bag easiest for you. It will also increase the strength of the straps and buckles.
You can also choose to buy the straps and buckles separately. This gives you greater control over the quality of the buckle. It means you can choose higher quality buckles such as UV-proof ones or ones that are made of stronger plastic to improve the quality and longevity of the buckles. It may also be cheaper to purchase the straps and buckles cheaper, however, as mentioned above it also entails more work to get the straps functional for your bag.
No matter which method you choose be sure you have enough length to fit over your spare tire. You will want around 40-50 inches of length depending on your vehicle size; it will not hurt to have extra strap to work with either. You will also need to ensure you have an easy way to adjust these straps to fit your rig.
How are you going to clean your bag out?
If the primary purpose of this bag is to store trash, logically, you need to consider how to clean it for health and hygiene. Even if you use bin liners it’s almost inevitable trash will soil the bag and gear at some point or another.
To combat this consider cutting holes in the base of the product. This will not impact its water-proofing but will allow you to quickly and easily wash and dry the bag when it’s soiled.
These holes also work as breathing holes ensuring you can use the bag as long-term storage for gear, clothing, or bedding without risking your belongings smelling dank. This also means that you can easily use the bag to store vegetables like potatoes and onions without them spoiling.
How solid do you want the bag?
You can easily rig up a metal frame to insert in the bag to reduce sagging and drooping. This will improve the lifespan and integrity of the bag and offer better protection for your gear. Using a frame may limit your storage options so it is more common to leave this step out of the DIY process.
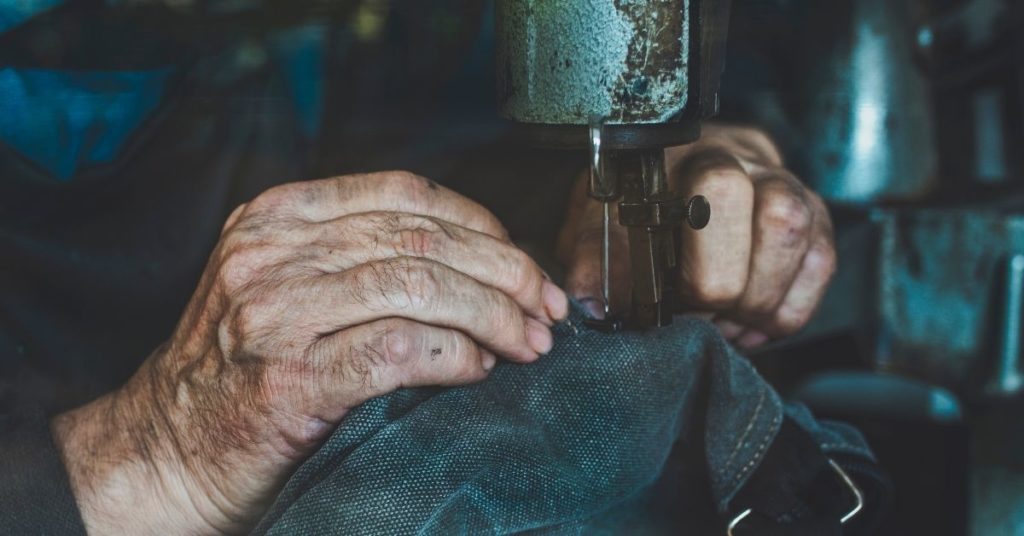
Do you have access to a sewing machine?
A sewing machine will dramatically increase the quality of your end product and the ease of the DIY process. When you attach the straps and other components (e.g., pockets or waterproofing material) using a double-stitch technique will improve the strength and integrity of the bag. This will offer you better support for heavy gear and firewood. A sewing machine will also be much easier than trying to sew by hand and adhesives and glues are not a very viable option for this project.
How to Make Your DIY Trasharoo
Now we’ve got all that out of the way here’s our step-by-step guide on how to make your Trasharoo.
Make any external changes you have planned
You may want to add features like Mollie straps and outside pockets to the bag. It’s a good idea to secure these alterations before you apply weather protection so you can weatherproof them in one go.
If you are planning on cutting breathing/ drainage holes it would be a good idea to do that during this step. If you forget and have to add if after waterproofing it’s no big issue as it should not impact the water-resistance as these holes should be on the bottom of the bag.
Apply weatherproofing
Before you proceed any further apply any weatherproofing you are planning to use. If you are using any spray-on products follow the manufacturer’s recommendations on the bottle and ensure the product is fully dried before you make any further modifications. Don’t forget to seal any outside seams to fully protect your bag from the elements.
Make any internal adjustments
In this step, you may want to add extra compartments and dividers in the bag. This can easily be done by folding the bag inside out and sewing, or even using appropriate adhesives (these can be used as the inside will usually be safe from harsher weather conditions). It’s important to have these fitted before you sew the straps so that the straps do not interfere with the adjustments.
This is also the step you may want to install an internal frame you have designed for extra support to check it works and looks how you want it to.
Attach the straps
Don’t forget that sewing is practically a must for these straps. They are the only thing holding the bag to your setup and you don’t want your gear flying off behind you! Double-stitching these straps will provide ultimate support for your gear.
You will want at least two straps to support your bag. Securing these straps in an X pattern behind the tire will give you excellent support and strength to hold your bag tight without sagging.
If you are not securing it to a tire then there are many ways you can anchor the bag to your setup. Don’t be afraid to experiment with these straps as the stitching can always be unpicked if you are unhappy with the way your bag sits.
After you find the best fit for the straps you can always use the original as a template to save time if you ever need to make a replacement.
Fit the bag and enjoy
Adjust the straps until you have a secure fit and you’re good to go!

- Tips and tricks For Setting Up Camp Like a Pro - September 11, 2023
- The Best Multi-Tools for Overlanding Adventures - August 25, 2023
- Off-Road Navigation Tips for Overlanders - August 13, 2023